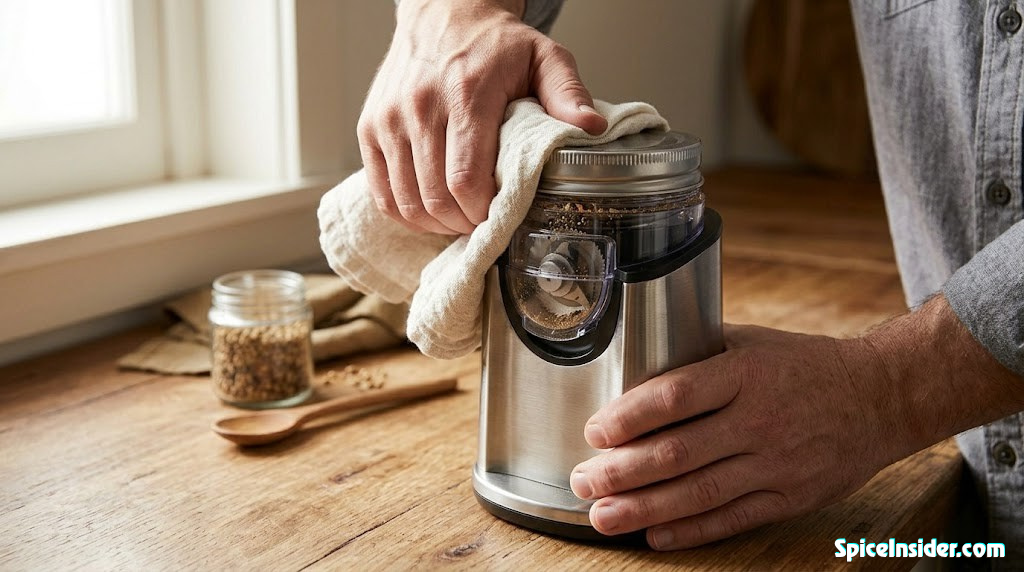
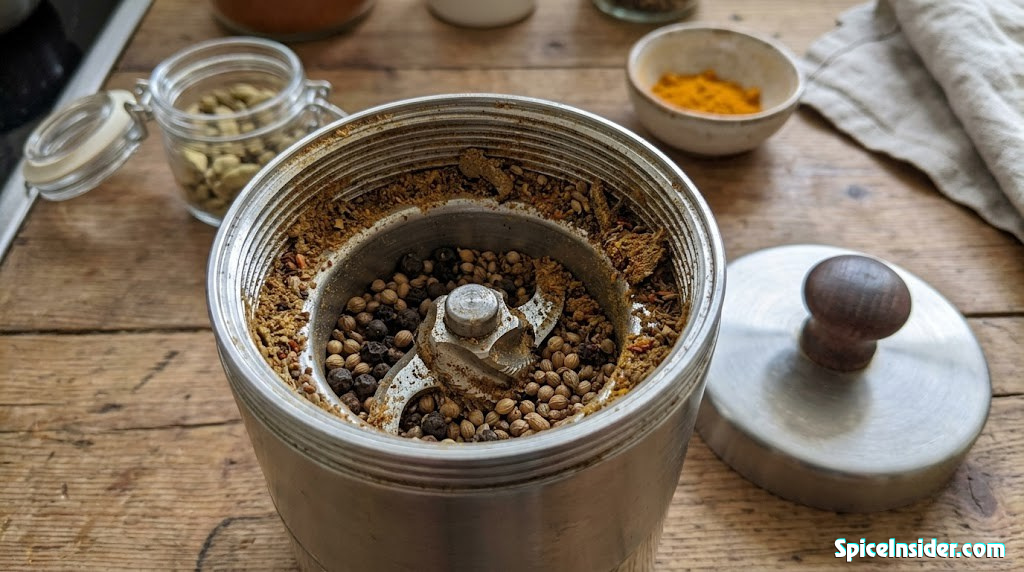
You’re midway through a curry paste. The toasted cumin is still warm. You reach for your best spice grinder, press down the lid to grind — and when it’s done, the thing will not open. You twist. You tap. You swear under your breath. Nothing moves.
A stuck spice grinder lid is one of those kitchen frustrations that seems minor until it’s happening to you at the worst possible moment. The good news: in almost every case, there is a straightforward reason the lid won’t move, and an equally straightforward way to fix it. This guide walks through every root cause and every proven solution — from the ten-second rubber-band trick to the full deep-clean protocol that prevents the problem from coming back.
Jump straight to 5 Instant Fixes if you’re in a hurry. Then come back to understand why it happened so it doesn’t repeat.
Why Spice Grinder Lids Get Stuck — The Root Causes
Before reaching for the rubber gloves, it helps to know what you’re actually dealing with. A stuck lid almost always traces back to one of a handful of core causes, and identifying which one you have determines the fastest fix.
1. Vacuum / Pressure Lock
When a blade grinder runs, the spinning action creates a partial vacuum inside the sealed grinding chamber. Once the motor stops, that low-pressure zone can act like a suction cup against the lid, holding it firmly in place even though the threads are not physically stuck. This is the most common cause with modern plastic and stainless grinders — especially if you grind for more than five seconds at a time.
2. Dried Spice Residue in the Threads
Spice oils, moisture, and fine powder work their way into the thread grooves during grinding. When the grinder cools, this slurry dries into a faintly adhesive crust that bonds the lid to the base. Cinnamon, cloves, cardamom, and any spice with natural oils are the worst offenders. This type of stuck lid feels stiff rather than impossible — you can feel slight movement, but not enough to unscrew.
3. Overtightening
Some people unconsciously tighten the lid as a reflex before grinding, pressing it harder than necessary. Over time, plastic thread grooves deform slightly under repeated torque, making it harder to release. Metal-on-metal grinders are less susceptible, but the principle applies to both.
4. Thermal Expansion
Heat generated by the motor causes both the lid and the grinding chamber to expand slightly. If you ground for a long time or tackled something hard like dried chilies or whole peppercorns, the heat may have temporarily swollen the plastic enough to seize the fit. This is why lids sometimes loosen on their own after the grinder sits for a few minutes — the parts cool and contract back to normal clearances.
5. Physical Jam / Blade Obstruction
In some blade grinders, the lid and blade assembly are one connected unit. If a large piece of spice wedges between the blade and the grinding wall, the whole assembly can lock — making it seem like the lid is stuck when the blade is actually the culprit. This is more common if you grind whole spices that haven’t been pre-broken.
6. Damaged or Cross-Threaded Lid
Less common but worth acknowledging: if the lid has been dropped, cleaned in a dishwasher when it shouldn’t have been, or if it was threaded onto the base at an angle, the threads can deform or cross-thread. This produces a different feel — the lid can’t be moved in either direction without significant force.
Never force the lid by gripping the blade assembly directly with your bare hand. Always grip the outer housing or use a cloth. Blade grinder blades are sharp enough to cause serious cuts even when stationary.

KitchenAid Blade Spice & Coffee Grinder
A grinder with a cleverly vented lid design that dramatically reduces pressure lock — one of the most common reasons lids seize after grinding.
Check Price on AmazonThe Pressure Lock Phenomenon — Explained in Detail
Pressure lock deserves its own section because it catches so many people off guard. Unlike sticky residue or overtightening, it can happen with a spotlessly clean grinder, and it resolves without any tools or force — once you know the trick.
Here’s the physics: a blade grinder is essentially a sealed cylinder when the lid is on. As the blade spins at high speed, it pushes air outward and downward, building slight negative pressure at the top of the chamber — particularly in the center, directly beneath the lid. When the motor cuts out and the blade stops, that low-pressure zone doesn’t equalize instantly because the sealed lid prevents air from rushing back in.
The result is that atmospheric pressure outside the lid (roughly 14.7 psi at sea level) is pushing the lid down slightly harder than the air inside is pushing it up. On a small grinder, this force can feel surprisingly strong — equivalent to several pounds of resistance that your fingers have to overcome before the threads can do their work.
How to Tell If Pressure Lock Is Your Problem
- The grinder is relatively clean — no obvious residue buildup
- The lid becomes easier to open after the grinder sits for 30–60 seconds
- You hear a faint “pop” or “whoosh” when the lid finally releases
- The lid was fine before but started sticking after you began grinding longer batches
The One-Second Fix for Pressure Lock
Tilt the grinder slightly so one edge of the lid lifts just a hair from the rim. This allows a tiny amount of air to enter the chamber and break the vacuum. Many people do this instinctively without knowing why it works. Alternatively, press down gently on the center of the lid (adding to the internal pressure momentarily) and then release quickly — this “pressure pop” often equalizes the chamber enough to let you turn the lid normally.
If your grinder has a small rubber gasket at the lid-to-bowl interface, you can also try inserting a thin butter knife or flathead screwdriver along the gasket edge — not to pry, but simply to break the seal and let air in. Go slowly and gently.
If pressure lock is a recurring issue, grind in shorter bursts (3–4 seconds on, 2 seconds off) rather than long continuous runs. This prevents the extended low-pressure buildup that makes the problem severe.
Residue and Gunk Buildup — The Slow-Motion Culprit
Spices are not clean substances. They contain volatile oils, natural resins, moisture, and fine powders that behave very differently depending on the spice and how long you’ve been grinding. Over days and weeks of use without deep cleaning, this material accumulates in the one place you can’t easily see or wipe out: the thread grooves between the lid and the grinding bowl.
Which Spices Cause the Most Buildup
| Spice | Residue Risk | Why | Cleaning Frequency Needed |
|---|---|---|---|
| Cinnamon | Very High | High oil content, fibrous, sticks in threads | After every 2–3 uses |
| Cloves | Very High | Eugenol-rich oil, thick and resinous | After every use |
| Cardamom | High | Seed husks + aromatic oils | After every 2–3 uses |
| Dried Chilies | Medium-High | Capsaicin oils + fine powder | After every 3–5 uses |
| Cumin | Medium | Moderate oil, but powder is very fine | After every 5–7 uses |
| Black Pepper | Lower | Drier oils, harder seeds | Weekly with regular use |
| Coriander | Low | Dry, light oils | Weekly with regular use |
The fix for residue-based sticking is warm water applied carefully to the thread area — never pouring water into the motor cavity, but using a damp cloth, a cotton swab, or a fine stream of warm running water directed specifically at the threads. Let it sit for 60–90 seconds to soften the crust, then attempt to turn the lid. The softened residue acts as a lubricant rather than an adhesive, and the lid usually breaks free with moderate pressure.
For a comprehensive approach to keeping your grinder truly clean — including the stubborn oil residue that plain water won’t touch — see our detailed guide on how to clean a spice grinder and remove odors. And if you’re wondering whether the whole unit can be submerged, this guide covers whether you can wash a spice grinder safely.
5 Instant Fixes to Try Right Now
These are ranked from quickest to slightly more involved. Try them in order before reaching for tools or heat.
Wait 60 Seconds and Try Again
If you just finished grinding, thermal expansion and pressure lock may both be at play. Set the grinder down, don’t touch it for one minute, and then try to unscrew the lid with firm, steady counter-clockwise pressure. This alone solves the problem about 30% of the time because both heat and vacuum equalize passively.
Rubber Band Grip Method
Wrap a wide rubber band around the lid — doubled over if it’s thin. The extra friction dramatically increases your effective torque without requiring more force. This is the single most useful trick in the kitchen, and it works on everything from jar lids to stubborn spice grinder caps. Grip firmly, apply steady counter-clockwise rotation, and maintain consistent pressure rather than jerking.
Hot-Damp Cloth on the Threads
Soak a small cloth or paper towel in hot tap water, wring it out until just damp, and press it around the thread area of the lid for 45–60 seconds. The warmth softens dried residue, and the slight moisture seeps into the thread grooves acting as a release agent. Try to turn the lid while the cloth is still in place. Works especially well for clove- and cinnamon-heavy buildup.
Tap Gently Around the Rim
Use the handle of a butter knife or a wooden spoon to tap lightly around the circumference of the lid where it meets the bowl. Rotate through the full 360°. These small vibrations break the suction seal and can crack loose dried residue that’s acting like a micro-weld around the threads. Don’t strike hard — you’re vibrating, not hammering.
Run Warm Water Around the Seam
Hold the grinder horizontally (motor side up, or with the motor cavity safely away from water) and let a thin stream of warm water run around the thread seam for 20–30 seconds. The water softens any residue bonding the threads. Immediately try to turn — don’t let the unit sit wet and then dry again, as that recreates the problem. Follow up with the rubber band method if needed.
Do not run water directly into the motor housing, do not put the grinder in the microwave to “loosen” it, and do not use WD-40 or any petroleum-based lubricant — these contaminate the grinding surfaces with substances you absolutely do not want in your food.

OXO Good Grips Jar Opener & Lid Remover
A wide, flexible grip designed for stuck lids — works perfectly on spice grinder caps, jar lids, and any stuck kitchen cover. One of the most useful items in a serious kitchen toolkit.
Check Price on AmazonTools & Household Hacks for the Really Stubborn Lid
If the five quick methods haven’t worked, the lid is genuinely seized. This is where you graduate to slightly more deliberate techniques. None of these require special equipment — everything below can be found in a standard home or kitchen.
Non-Slip Dish Gloves
Rubber dish gloves aren’t just for washing up. Pull them on and grip the lid with your full palm — the textured rubber provides enough friction that even a seized lid often gives way with a controlled twist. The advantage over a rubber band is that your whole hand is gripping, not just a thin band, which gives you more even torque distribution and reduces the risk of the lid snapping off suddenly.
The Strap Wrench
Sold at hardware stores for pipe fittings, a strap wrench is a loop of rubber or silicone attached to a handle. Wrap it around the lid, tighten the loop, and apply torque via the handle. This is effectively a mechanically amplified rubber band — it can generate considerably more turning force than your fingers alone, and because the strap distributes pressure evenly, there’s very little risk of cracking a plastic lid.
Silicone Baking Mat Grip
If you bake, you almost certainly have a silicone baking mat or silicone pot holders. Fold one over the lid and grip. Silicone’s coefficient of friction against smooth plastic is high enough to give you the same effect as a rubber band over a much larger surface area. This is particularly useful on grinders with a smooth, domed lid that rubber bands tend to slip off.
The Two-Person Method
Simple but genuinely effective: one person grips the bowl firmly with both hands while the other turns the lid. This prevents the bowl from rotating with the lid — a common reason solo attempts fail. The person holding the bowl should grip it over a non-slip surface (a kitchen towel on the counter works well), while the person on the lid uses rubber gloves.
Coin or Flathead Leverage at the Seam
For grinders where the lid simply rests on a rim rather than threading (some electric models have this configuration), insert a flat coin or flathead screwdriver blade at the seam between lid and bowl and gently rotate to break the seal. Apply leverage slowly — the goal is to let air in, not to pry with force.
Thin Thread Dental Floss Trick
For a lid that’s glued down by hardened residue rather than vacuum, thread a length of unwaxed dental floss into the seam and saw it gently around the circumference. The floss cuts through the thin crust of dried spice oil exactly like it cuts through soft food, releasing the bond without any torque applied to the lid at all. This one sounds unusual but works remarkably well on older grinders with heavy buildup.
Restaurant cooks who grind spices in quantity typically keep a piece of cut bicycle inner tube (a natural rubber strip) hanging near their grinder specifically for stuck-lid situations. It’s cheap, durable, and grips far better than a rubber band.
The Deep-Clean Method to Prevent Recurrence
Getting the lid off is step one. Making sure it doesn’t happen again next week requires a proper cleaning of the thread area — the part that almost everyone ignores. This section ties directly into the full spice grinder cleaning guide, but focuses specifically on the threads and lid interface.
What You Need
- Old toothbrush (dedicated to kitchen use)
- Warm water with a drop of dish soap
- Cotton swabs
- Dry microfiber cloth
- Optional: small amount of food-safe coconut oil or mineral oil for lubrication
Step-by-Step Thread Cleaning
Step 1 — Dry brush: With the lid removed, use a dry toothbrush to sweep out the thread grooves of both the lid and the bowl. Work in small circular motions, dislodging loose powder and dried bits. Do this over a paper towel so you can see what’s coming out.
Step 2 — Damp brush pass: Dip the toothbrush in warm soapy water and scrub the threads again. The moisture softens any remaining oil crust. Rinse with a small amount of warm water — never submerge the bowl if it contains the motor.
Step 3 — Cotton swab detail: Roll a damp cotton swab along each thread groove. Thread grooves are helical (spiral), so follow that spiral path rather than going straight across. You’ll be surprised how much dark residue comes off even after the toothbrush pass.
Step 4 — Dry completely: This is the most important step and the most skipped. Air-dry the lid and bowl upside down for at least 30–60 minutes before reassembling. Any moisture left in the threads will dissolve powder from the next grind and reconstitute into the exact adhesive crust you just removed.
Step 5 — Light lubrication (optional): Apply a tiny amount of food-safe coconut oil or mineral oil to the thread surfaces using a cotton swab. This creates a slick barrier between the metal or plastic surfaces and future spice residue, making the next clean-out effortless. Use sparingly — you’re lubricating, not greasing.
For eliminating strong spice smells that accumulate in the grinder alongside this residue, particularly if you’ve been grinding garlic or very pungent chilies, read our guide on getting smell out of a spice grinder using rice and bread.
Grinding a tablespoon of raw white rice after each session isn’t just an odor trick — the abrasive action of rice absorbs spice oils and powder from the blade and walls, significantly reducing the residue that eventually migrates into the threads. It’s the simplest maintenance habit you can build.

OXO Good Grips Deep Clean Brush Set
Stiff nylon bristles reach into spice grinder thread grooves, blade guards, and tight seams where standard cloths can’t. A must-have for regular grinder maintenance.
Check Price on AmazonWhen the Blade Is Jammed Too
Some blade grinders — particularly compact models where the lid, blade, and grinding bowl form a single connected assembly — can give you what feels like a stuck lid when the real problem is a blade jam. The blade has locked against a hard piece of spice or debris, and since the lid is mechanically connected to the blade shaft, the whole assembly is frozen.
Identifying a Blade Jam
- The lid won’t turn in either direction — not even a millimeter of rotation
- You can feel rigid resistance that doesn’t flex or give at all
- The grinder made an unusual noise (grinding halt, clunk) just before stopping
- You were grinding something particularly hard — dried star anise, cardamom pods, or hard cinnamon sticks
If you suspect a blade jam, do not apply maximum torque to the lid. The blade assembly can crack if twisted hard while locked. Instead:
Unplug the Grinder Immediately
For electric models — always unplug before attempting any physical intervention. Even if the motor stopped automatically, the switch may still be live.
Turn the Grinder Upside Down and Shake
With the lid facing down, give several firm shakes. Sometimes the obstructing piece falls away from the blade under its own weight, freeing the mechanism. Try to open after this before doing anything more invasive.
Use a Skewer or Chopstick at the Seam
If your model has any gap at the rim, carefully insert a thin wooden skewer to try to shift the obstructing piece off the blade path. Move it gently — you’re not prying, just repositioning the obstructing spice piece. A flashlight and some patience go a long way here.
Run Motor in Very Short Burst (Electric Only)
If the blade is jammed but not completely frozen, a half-second motor burst may be enough to dislodge the obstruction. Re-plug, pulse for half a second, unplug again, and try the lid. Do this only if you’re confident the jam is from a spice piece, not a structural failure. Check our troubleshooting guide on why spice grinders leave chunks for more on handling difficult whole spices.
For issues where the motor itself seems compromised — burning smells, no response, unusual heat — see our guide on spice grinder motor burning smell before attempting any further troubleshooting. A blade jam that causes motor stress can damage the unit permanently if addressed incorrectly.
Overtightening: How It Happens and How to Recover
Overtightening is a habit that develops over time, often in response to the lid feeling “loose” during grinding — so the user naturally tightens more each session. The problem compounds because each over-tight session slightly deforms the thread engagement, making the threads bind a little more next time, which prompts yet more tightening.
Recognizing Overtightened Threads
- The lid feels stiff to turn on, not just off
- You can see faint deformation lines or wear marks on the lid rim
- The grinder is relatively new but the lid is already much harder to open than when you first bought it
- On a plastic grinder, the threads may show white stress marks (crazing)
Recovery Protocol
For genuine overtightening, the goal is to provide controlled torque in the counter-clockwise direction without adding any additional downward pressure. Additional downward pressure increases thread engagement and makes the problem worse.
Hold the bowl stationary against your body (pressing it against your stomach or thigh gives you a stable pivot point) while turning the lid with your dominant hand using only rotational force — no pressing down. If you have a strap wrench, this is exactly the scenario it was designed for.
Once the lid is off, inspect the threads for deformation. If plastic threads are visibly warped, the lid should be replaced rather than continued in use — a warped thread will cross-thread unpredictably and can cause the lid to seize completely on a future grind. If the threads look intact, resume normal use but change the habit: tighten the lid only until snug, then add a half-turn at most. No more than that. The lid doesn’t need to be “locked on” — the blade’s rotational momentum keeps things in place during grinding.
- Snug fit plus a half-turn maximum
- No downward pressing while tightening
- Consistent torque every time
- Thread grooves clean and lubricated
- Lid replaced if threads deform
- Pressing lid down hard while turning
- Adding extra turns “just to be safe”
- Grinding in long uninterrupted bursts
- Using excessive force on a plastic lid
- Ignoring thread wear marks

Cuisinart SG-10 Electric Spice & Nut Grinder
The SG-10 features a removable grinding bowl with a well-engineered lid-to-bowl fit that minimizes both pressure lock and overtightening issues — read our full Cuisinart SG-10 review for the complete breakdown.
Check Price on AmazonFixes by Grinder Type — What Works Where
Not all spice grinders are built the same, and the best fix depends heavily on how your particular grinder is designed. Understanding your grinder’s anatomy prevents you from applying the wrong solution and potentially causing damage.
Compact Blade Grinders (Repurposed Coffee Grinders)
This is the most common type for home spice grinding — a cylindrical plastic or stainless bowl with a motorized lid that screws on. Examples include the Krups F203, many Amazon Basics models, and the Secura electric spice grinder. The lid IS the motor, which means it’s heavier than it looks.
For these: pressure lock and residue are the dominant causes of sticking. The rubber band method, tilting technique, and hot-cloth-at-the-threads approach all work well. Since the motor is in the lid, never run water directly on it. Clean the thread grooves of the bowl with a damp swab instead, keeping the motor-lid assembly dry.
Standalone Bowl Grinders (Removable Bowl Design)
Some models — notably the Cuisinart SG-10 and similar — separate the motor from the bowl. The bowl is a standalone container that lifts out of a motor base, with a separate lid that is simply a plastic or glass cover. These are far less prone to lid-seizing because the lid has no motor weight pressing down on it and the bowl can be rinsed freely. If the lid sticks on one of these, it’s almost certainly residue-only — a quick rinse and the rubber band method sorts it immediately.
Electric Burr Grinders (Rare for Spices)
If you’re using a burr grinder for spices (see our blade vs burr grinder comparison), the “lid” is typically a hopper at the top. Hoppers don’t thread on — they press-fit or clip in. A stuck hopper is almost always residue at the press-fit seam. Clean the seam with a dry brush, twist gently (rather than pulling straight up), and it should release.
Manual Spice Grinders (Mortar-Style or Crank)
These are rarely “stuck” in the traditional sense, but the pestle or grinding plate can seize against the bowl after extended wet grinding. Hot water and a few minutes of soaking resolves almost every case. If you’re curious about grinding spices without any electrical device at all, check out our guide on how to grind spices without a grinder.
| Grinder Type | Most Common Stuck-Lid Cause | Best First Fix | What to Avoid |
|---|---|---|---|
| Compact Blade (motor-in-lid) | Pressure lock + residue | Wait 60s → rubber band | Water on motor housing |
| Standalone Bowl | Residue only | Warm rinse + rubber band | Excessive torque on plastic lid |
| Burr Grinder Hopper | Residue at press-fit seam | Dry brush + gentle twist | Pulling straight up with force |
| Manual Grinder / Mortar | Wet residue swelling | Hot soak for 5–10 min | Using metal tools to pry stone |
Long-Term Maintenance Habits That Prevent the Problem Entirely
Most people who experience recurring stuck-lid problems aren’t doing anything dramatically wrong — they’re just missing two or three maintenance habits that make a significant difference over time. Building these into your routine takes about two minutes per session and prevents nearly every stuck-lid scenario.
Grind in Short Pulses
Rather than holding the power button down for 10–15 seconds at a stretch, use 3–5 second pulses with brief pauses. This reduces heat buildup (preventing thermal expansion of the lid), reduces pressure buildup inside the chamber (reducing vacuum lock), and actually produces more even grinding results. It also reduces motor strain. For a deeper look at proper grinding technique from start to finish, our guide on how to use a spice grinder covers the full workflow.
Wipe the Thread Groove Before Each Use
Before loading spices, run a dry cotton swab along the thread groove of the bowl. This 30-second habit catches early-stage buildup before it hardens. You’ll quickly develop a feel for which spices leave residue and which don’t — and calibrate your cleaning frequency accordingly.
Toast Spices Before Grinding
This sounds counterintuitive for preventing residue, but toasting whole spices before grinding actually reduces the moisture and soft oil content that causes residue. Toasted spices grind to a drier, finer powder that is far less likely to leave adhesive buildup in the threads. The flavor benefits are considerable too.
Store the Grinder With the Lid Off
Between uses, store your grinder with the lid placed loosely on top rather than screwed on. This prevents any remaining moisture or powder from drying in the thread interface and forming the adhesive crust that causes sticking. It also allows any residual heat to dissipate freely.
Monthly Thread Inspection
Once a month, do a visual inspection of the thread grooves with a flashlight. Look for buildup accumulation, discoloration, or visible deformation of the threads themselves. Early-stage buildup comes off easily; late-stage buildup requires soaking and scrubbing. Catching it early is much easier.
Follow the Dos and Don’ts
For a comprehensive list of usage practices that keep your grinder performing optimally, the spice grinder dos and don’ts guide covers everything from what to grind to how to store. And if grinding consistency is a concern alongside maintenance, read our troubleshooter on why your spice grinder might not be fine enough.
Once a week: dry brush the threads, run a tablespoon of rice to absorb oil residue, wipe the bowl with a damp cloth, dry completely, apply a tiny amount of food-safe oil to the threads, and store lid-off. Five minutes total. This single routine eliminates stuck-lid incidents almost entirely.

KRUPS F203 Electric Spice & Coffee Grinder
A reliable compact blade grinder with stainless steel bowl and well-calibrated lid fit — applies the principles above easily with regular cleaning. Widely considered one of the most durable budget options available.
Check Price on AmazonWhen It’s Time to Replace — Not Just Fix
Most stuck-lid problems are fixable. But there are situations where the grinder has structurally failed and continued use creates safety risks or produces poor results. Knowing when to replace rather than repair saves you frustration and prevents a suddenly jammed grinder from being a bigger problem at a worse moment.
Signs the Lid (or Grinder) Needs Replacing
- Cracked or crazed threads: Fine web-like cracks in the plastic around the thread area indicate material fatigue. The lid can shatter under torque.
- Stripped threads: If the lid spins freely without engaging — in other words, it doesn’t tighten at all anymore — the threads are stripped. This is irreparable.
- Warped lid that no longer seals flat: A warped lid allows spice powder to spray outward during grinding and exposes the motor to fine dust, accelerating wear.
- Motor that runs hot and smells burnt: If the motor is overheating on a lid-jammed grinder (common when users try to force a jammed blade by running the motor), the grinder may need replacement. Check our guide on spice grinder motor burning smell to diagnose before replacing.
- Grinding output is coarse and inconsistent despite blade being intact: See our post on why your spice grinder isn’t fine enough — sometimes a grinding problem is actually a blade wear issue that no lid fix can resolve.
If you’ve decided it’s time for a new grinder, our complete review of the best spice grinders is the most comprehensive place to start. If durability is your primary concern after experiencing a stuck lid or broken threads, specifically look at models reviewed in our spice grinder that doesn’t break roundup — those are tested specifically for structural longevity. And if you also grind coffee in the same machine, read whether you can safely grind coffee in a spice grinder before buying a replacement.
Replacement vs Repair — Quick Reference
| Situation | Recommendation | Urgency |
|---|---|---|
| Lid stuck due to residue | Clean and continue using | Fix Now |
| Lid stuck due to pressure lock | Wait + rubber band; adjust habits | Fix Now |
| Lid stuck due to overtightening | Fix and adjust tightening habit | Fix + Monitor |
| Threads visibly deformed or crazed | Replace lid or grinder | Replace Soon |
| Threads completely stripped | Replace grinder | Replace Now |
| Motor burning smell + lid jam | Stop using; diagnose motor | Stop & Assess |
| Lid cracked under torque attempt | Replace grinder immediately | Replace Now |

Secura Electric Stainless Steel Spice Grinder
All stainless interior with precision-machined threads — dramatically less prone to overtightening damage and residue adhesion than plastic-threaded alternatives. See our Secura spice grinder review for the full assessment.
Check Price on AmazonFrequently Asked Questions
A recurring stuck lid usually points to one of two persistent causes: pressure lock from running the grinder for long uninterrupted periods, or progressive residue buildup in the thread grooves that isn’t being cleaned between uses. Switching to short 3–5 second pulses and doing a quick thread brush after every session typically resolves chronic sticking within a week.
Generally, a brief half-second burst is acceptable and can sometimes dislodge a blade obstruction. However, running the motor for extended periods with a lid that is sealed tight from pressure lock is not recommended — it increases internal pressure further and can overheat the motor faster than normal. Always unplug the grinder before attempting any physical manipulation of the lid or blade.
No. WD-40 and petroleum-based lubricants are not food-safe and would contaminate your grinding surfaces with chemical residue that cannot be easily cleaned. Cooking sprays (PAM, etc.) leave an oil film that degrades quickly and becomes sticky at room temperature, making the problem worse over time. Use warm water or, if you want a food-safe lubricant on the threads, a tiny amount of coconut oil or food-grade mineral oil applied with a cotton swab after cleaning.
Completely normal, and actually a useful diagnostic. That pop is the pressure equalization as air rushes into the low-pressure grinding chamber — confirmation that vacuum/pressure lock was the primary cause of your stuck lid. No damage has occurred. The pop means the fix worked and that shorter grinding bursts will prevent recurrence.
Snug plus a half-turn is the standard guidance — tight enough that the lid doesn’t rattle or wobble, but not so tight that you need effort to unscrew it afterward. The blade’s own rotational momentum keeps the lid in place during grinding; you are not relying on thread compression to prevent the lid from flying off. Tighter is not safer — it’s just harder to open.
Two things happen as the grinder cools: first, thermal expansion reverses — the plastic or metal parts that swelled slightly from motor heat contract back to their resting dimensions, creating more clearance in the thread fit. Second, the internal pressure equalizes gradually through micro-gaps in the seal. Together, these effects can make a lid that was impossible to open immediately after grinding come off easily after 2–3 minutes of cooling.
Cloves and cinnamon are the highest-risk offenders due to their high essential oil content. Cardamom, star anise, and allspice are close behind. Any spice that leaves an oily film on the bowl interior is capable of migrating into the thread grooves and creating adhesive buildup. Drier spices like coriander and black pepper pose much lower risk and may not need thread cleaning after every use.
This depends entirely on your model. Many plastic lids warp in dishwasher heat, which worsens sticking significantly. Most motor-in-lid designs cannot go in the dishwasher at all. Always check the manufacturer’s guidance. For most grinders, hand washing with warm soapy water and a toothbrush is the safest and most effective cleaning method — our guide on whether you can wash a spice grinder covers this in detail by model type.
If the rubber band gives you grip but the lid still won’t turn, the issue is likely residue adhesion rather than friction-limited torque. Apply warm water to the thread seam, wait 60 seconds, then try the rubber band again. If that still fails, use the dental floss method (saw floss around the thread seam to cut the residue crust) and then try the rubber band. If nothing works, a strap wrench from a hardware store is the most reliable next step — it provides significantly more mechanical advantage than any kitchen improvisation.
Ideally, yes. Coffee oil residue and spice oil residue compound each other in the thread grooves, and flavor cross-contamination is a real concern. Using the same grinder for both dramatically increases the residue load and makes stuck-lid incidents more frequent. If a separate grinder isn’t practical right now, the rice cleaning method between uses is essential. Our guide on grinding coffee in a spice grinder covers the tradeoffs in full.
Conclusion: Fix It Once, Prevent It Forever
A stuck spice grinder lid is almost always fixable within a few minutes using nothing more than warm water, a rubber band, and steady counter-clockwise pressure. The key is identifying which of the six core causes you’re dealing with — pressure lock, residue, overtightening, thermal expansion, blade jam, or thread damage — before applying force.
For pressure lock: wait, tilt, or pop the seal. For residue: soften with warmth, then grip with friction. For overtightening: steady torque with no downward pressure, then change the habit. For blade jams: unplug, shake, investigate. For thread damage: consider replacement.
The maintenance habits — short grinding pulses, thread brushing after oily spices, storing lid-off, and a monthly inspection — take less than five minutes a week and prevent virtually every recurrence. Your grinder will last longer, grind better, and never strand you mid-recipe again.
Ready to upgrade to a grinder designed to minimize these issues from the start? Our roundup of the best spice grinders on the market covers models with superior lid engineering, stainless steel thread grooves, and removable bowl designs that are easy to clean properly.
→ See the Best Spice Grinders Reviewed