How to Use a Spice Grinder
From loading to grinding to cleanup — the complete, expert-written guide to getting the most from your spice grinder every single time.
Why a Proper Technique Transforms Your Cooking
A spice grinder looks simple — you put spices in, press a button, and ground spice comes out. And that’s true enough as a basic description. But there’s a meaningful gap between operating a spice grinder and using one well. The difference shows up in your cooking: in the texture of your ground cumin, in whether your cardamom turns to powder or stays as gritty shards, in whether your grinder smells like last week’s cloves when you try to grind this week’s fennel.
This guide covers all of it. You’ll learn how to properly load a grinder for even, consistent results; the difference in technique between blade and burr grinders; how to achieve specific textures for different spices and dishes; how to extract every last bit of powder efficiently; and how to clean and maintain your grinder so it performs like new for years. Along the way, you’ll find a complete spice-by-spice reference, a troubleshooting section for the most common issues, and advanced techniques most grinder owners never discover.
If you haven’t yet chosen a grinder, our guide to the best spice grinders covers every category from budget blade units to professional burr grinders. And if you don’t have a grinder at all right now, how to grind spices without a grinder has eight proven alternatives. But if you do own a grinder and want to get more from it — read on.
🌿 What You’ll Get From This Guide
By the end, you’ll know exactly how to load, run, and clean your grinder; which settings or techniques give you coarse crack versus fine powder; which spices need special handling; and how to avoid the five mistakes that cause most grinder problems. Each major step includes an SVG diagram for visual reference.
Types of Spice Grinders — What You’re Working With
Before diving into technique, it helps to know which category your grinder falls into, because the approach differs meaningfully between them.
Most common
Best precision
Traditional
Portable
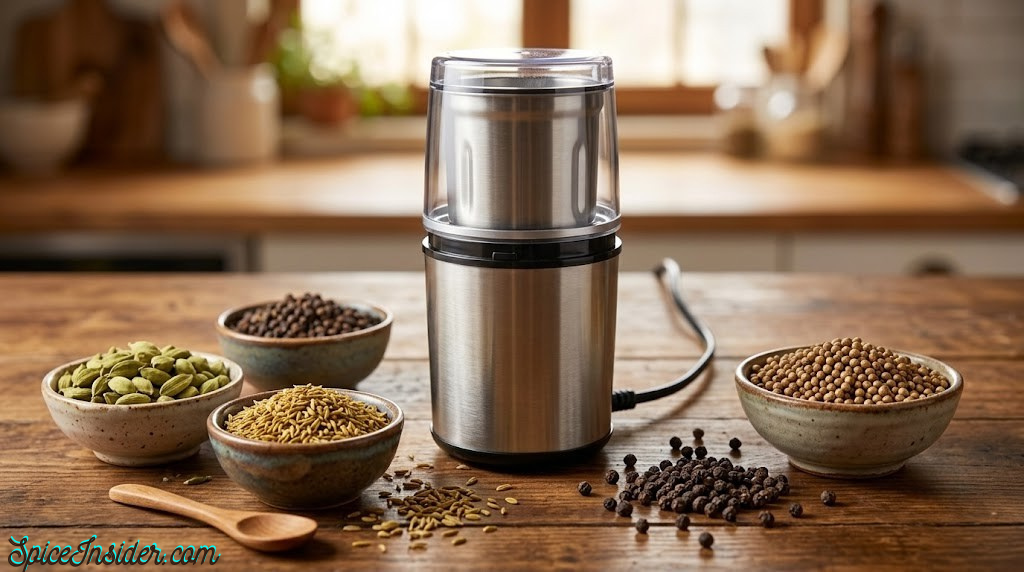
Blade Grinders
Blade grinders use a rapidly spinning metal blade — identical in concept to a blender — to chop and pulverize spices. They’re inexpensive, widely available, and fast. The trade-off is consistency: because the blade generates heat and chops rather than grinding, the result can have a mix of fine powder and larger unbroken pieces. Technique matters more with blade grinders than any other type. The Cuisinart SG-10 and Secura electric grinder are popular blade models with dedicated spice chambers.
Burr Grinders
Burr grinders use two abrasive surfaces (burrs) that rotate against each other to crush spice uniformly. Because every particle passes through the same gap, the resulting grind is far more consistent. They’re quieter, gentler on volatile oils, and adjustable for particle size. They’re also more expensive. For a detailed comparison, see our blade vs. burr grinder breakdown.
Manual / Hand Mills
Small crank-operated mills are excellent for table-side grinding of pepper and some other whole spices. They produce consistent results and require no electricity. Most are built for a single spice type, though, and lack the versatility of electric options.
The step-by-step technique that follows is written primarily for electric blade grinders — the most common type — with notes where burr grinders require a different approach.
Before You Grind: Preparation That Improves Every Result
What you do before turning on the grinder determines the ceiling of your results. Three preparation steps consistently separate excellent ground spice from mediocre:
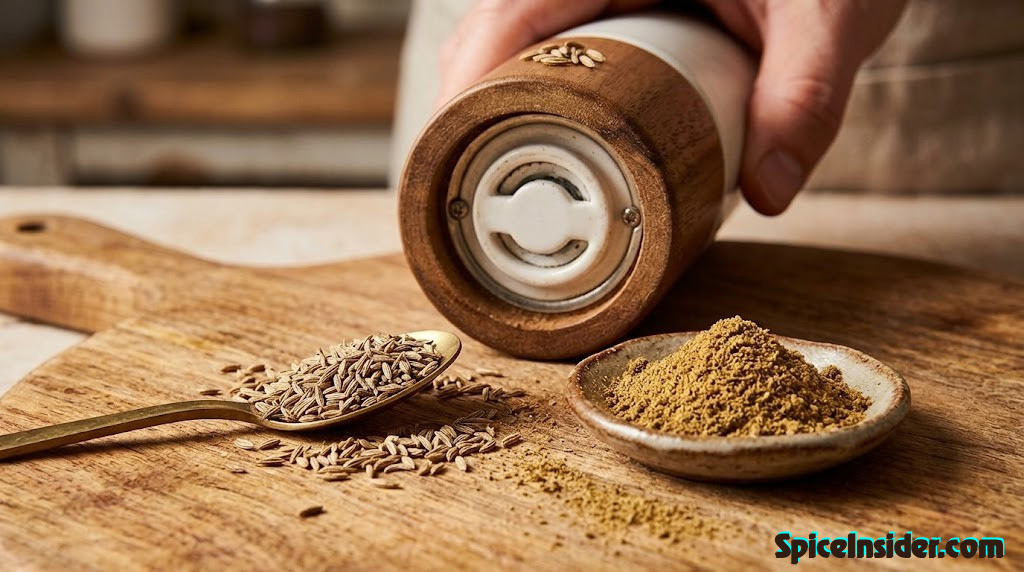
1. Toast your whole spices
This is the single highest-impact thing you can do before grinding. Dry-toasting whole spices in a skillet over medium heat for 60–90 seconds — stirring constantly — triggers the Maillard reaction and caramelizes surface compounds, creating new flavor molecules that don’t exist in raw spice. The aroma change is immediate and dramatic. Let the toasted spices cool completely on a plate before adding them to the grinder; grinding hot spice causes condensation inside the chamber. For the complete technique, see our guide to toasting spices before grinding.
2. Check that the grinder is clean and odor-free
Grinding cumin in a chamber that still holds yesterday’s clove oils will muddy both spices. Before every use, do a quick smell test — open the grinder and inhale. If you detect residual aroma from a previous grind, clean before proceeding. If you regularly alternate between coffee and spices, see our guide on spice grinder odor removal — the rice method takes under two minutes. Our dedicated article on whether you can grind coffee in a spice grinder covers cross-contamination in detail.
3. Break down very large pieces first
Cinnamon sticks, star anise, and whole dried chiles are often too large to grind evenly in a small electric grinder. Snap or break them into smaller pieces before loading — this gives the blade or burrs a head start, produces more even results, and reduces wear on the motor. A quick smash with the flat of a knife or the bottom of a pan does the job.
Step 1 – Loading the Grinder Chamber Correctly
Fill to the correct level — not more, not less
The single most important technique variable with a blade grinder is how much spice you load. There’s a “Goldilocks zone” — too little and the blade can’t catch the seeds; too much and the blade grinds only the spices at the bottom while those on top sit untouched.
For most electric blade grinders: fill the chamber between one-quarter and one-half full. This is typically 2–4 tablespoons of whole spice. The exact volume varies by grinder model — check your manual for the manufacturer’s recommended minimum and maximum.
For burr grinders: load the hopper as directed by the manufacturer. Burr grinders often accept more spice since the consistent gap between burrs means even a full hopper grinds evenly.
Secure the lid before every grind
This sounds obvious, but improperly seated lids are a top cause of spice escaping the chamber during grinding — a mess that wastes spice and can clog the motor vent. For grinders with a twist-lock lid: align the arrows, press down, and rotate firmly until you feel the lock engage. For press-down lids: apply even pressure across the entire lid surface, not just the center.

One of the most popular dedicated spice grinders — removable stainless bowl, sturdy lid lock, and consistent blade performance. Read our full Cuisinart SG-10 review.
View on Amazon →Step 2 – Grinding: Pulse vs. Continuous, and Reading Texture
Use the pulse technique — not continuous grinding
This is the most important operational technique for blade grinders. Running the motor continuously for 30 straight seconds doesn’t produce better powder — it generates heat from friction, which degrades volatile aromatic oils, and it can actually cause seeds to cake against the sides of the bowl rather than circulating under the blade.
Instead: use 5-second pulse bursts, pausing for 1–2 seconds between each. After every 2–3 pulses, pick up the grinder and give it a firm shake or tap — this redistributes the spice so the portion that was sitting against the walls falls back under the blade. Repeat until you reach your target texture.
Read the texture — know when to stop
The right moment to stop grinding depends entirely on what you’re making. Here’s a quick reference guide to the three main texture targets and how to identify them by sight and sound:
The grinder also tells you when you’re close: the pitch of the motor shifts from a labored, chunky sound to a smoother whir as the spice becomes more uniform. Trust your ears as much as your eyes.
Grind in the correct sequence when doing multiple spices
When making a spice blend (garam masala, baharat, curry powder), the order in which you grind matters. Grind harder spices first — cinnamon sticks, cloves, allspice — then add softer, more aromatic ones like cumin and coriander. This prevents the soft spices from becoming over-ground while the hard ones are still reducing. Or, pre-grind each type separately and combine afterward for maximum control.
Step 3 – Extracting the Ground Spice Without Wasting Any
Tap, invert, and brush — get every last particle
After grinding, a portion of the powder always clings to the blade, the chamber walls, and the lid. If you just tip the grinder and pour, you’ll lose 15–25% of your powder to residue. A proper extraction technique recovers almost all of it.
The three-step extraction: (1) Remove the lid, invert the chamber over your bowl, and tap the base firmly several times. (2) Use a small silicone spatula or butter knife to scrape the walls and underside of the lid. (3) For powder caught around the blade, a clean pastry brush or a stiff kitchen brush loosens it without requiring water near the motor. Together, these steps recover almost all of the ground spice.

Removable grinding bowl makes extraction and cleaning dramatically easier than fixed-bowl models. See our full Secura review.
Check on Amazon →Step 4 – Cleaning After Every Use
This step is not optional. Residual spice oils in the chamber oxidize between uses, creating off-flavors that transfer to the next grind. A grinder cleaned immediately after use — while oils are still fresh and loose — takes under two minutes. A grinder left uncleaned for days takes much longer and may never fully recover its neutral baseline.
The rice-and-wipe method (most effective for blade grinders)
Add one tablespoon of uncooked white rice to the empty (dry) chamber. Grind for 10–15 seconds until the rice becomes a fine powder. The rice absorbs residual oils and picks up any remaining spice particles. Discard the rice powder, then wipe the chamber, lid, and around the blade with a dry paper towel or clean cloth. This method removes 90%+ of spice residue and is safe for all grinder types.
For stubborn odors (after grinding cloves, star anise, or dried chiles), follow the rice step with a half-tablespoon of stale bread torn into small pieces. Grind for 10 seconds and discard. Bread is mildly abrasive and highly absorbent — it picks up what rice misses. Full details on this technique are in our rice and bread odor removal guide.
Spice-by-Spice Grinding Reference
Different spices have different densities, oil content, moisture levels, and seed structures. What works perfectly for cumin can leave cardamom as gritty shards. Use this table as your quick-reference guide:
| Spice | Pre-toast? | Prep Step | Grind Time (blade) | Texture Target | Notes |
|---|---|---|---|---|---|
| Black Pepper | ✔ Optional | None | 10–20 sec | Coarse to fine | Most versatile; stop early for cracked pepper |
| Cumin | ✔ Yes | Toast 60 sec | 15–25 sec | Fine | Soft seed; grinds fast; don’t over-run |
| Coriander | ✔ Yes | Toast 60 sec | 15–25 sec | Fine to medium | Slightly hollow; grinds easily |
| Cardamom | ✔ Optional | Crack pods, remove seeds | 20–30 sec | Fine | Green husk optional; seeds grind well |
| Cinnamon Stick | ✘ No | Break into pieces | 30–45 sec | Fine | Hard, fibrous; longest grind time |
| Cloves | ✔ Optional | None | 20–25 sec | Fine | Very oily; clean grinder immediately after |
| Fennel Seeds | ✔ Yes | Toast 45 sec | 15–20 sec | Medium to fine | Fragrant; grinds fast |
| Star Anise | ✘ No | Break into points | 25–35 sec | Fine | Brittle; breaks easily; very aromatic |
| Dried Chiles | ✔ Optional | Remove stem & seeds | 20–30 sec | Flakes to powder | Wear gloves; capsaicin dust is potent |
| Nutmeg | ✘ No | Break whole nutmeg | 35–50 sec | Fine | Very hard; use microplane for small amounts |
| Allspice | ✔ Optional | None | 20–25 sec | Fine | Similar density to black pepper; grinds well |
| Mustard Seeds | ✘ No | None | 15–20 sec | Coarse to fine | Small and hard; bouncy — keep lid firmly on |
Blade vs. Burr Grinder — How Technique Differs
Owning one type versus the other changes your approach to several of the steps above. Here’s a side-by-side comparison of key operational differences:
| Factor | Blade Grinder | Burr Grinder |
|---|---|---|
| Grinding Motion | Chopping (random) | Crushing (uniform gap) |
| Technique | Pulse bursts + shake | Continuous at set speed |
| Texture Control | By time only (imprecise) | By dial setting (precise) |
| Heat Generated | More (friction from blade) | Less (slower, controlled) |
| Consistency | Variable — mix of fine + coarse | Highly consistent |
| Minimum Batch | 2–3 tbsp | 1–2 tsp (some models) |
| Price Range | $15–$50 | $50–$200+ |
| Best For | Regular home cooking | Serious cooks, precision blends |
Our complete analysis of the trade-offs — including which spices respond better to burr grinding — is covered in depth in the blade vs. burr grinder guide.

A reliable, wide-bodied blade grinder with a pulse button and a chamber large enough to grind 3–4 tablespoon batches consistently.
See on Amazon →Common Mistakes to Avoid
These are the five mistakes that account for the overwhelming majority of bad outcomes with spice grinders — from gritty texture to burnt-smelling powder to a machine that dies too early.
Sustained grinding generates friction heat that degrades aromatic oils and can overheat the motor. Always pulse in 5-second bursts and pause to shake and check texture between cycles.
More than half-full means the blade only contacts the bottom layer. The top spices sit unground while the bottom ones become over-ground powder. Fill to the recommended level — 2–4 tbsp for most blade grinders.
Residual oils from the last grind transfer to the next one. Clove, star anise, and dried chile residue are especially persistent. A 15-second rice grind after each use prevents cumulative odor buildup entirely.
Fresh ginger, fresh turmeric root, or moist dried fruit will gum up a blade grinder rapidly. Electric blade grinders are for dry, shelf-stable spices only. For wet pastes, use a mortar and pestle or a blender. If you’re unsure, see our spice grinder dos and don’ts.
An improperly seated lid lets fine powder escape into the motor vent, shortening the grinder’s lifespan and creating a cleanup problem. Always confirm the lid is locked before pressing the grind button. If your lid sticks, our stuck grinder lid guide has fixes.
Troubleshooting: Solving the Most Common Problems
| Problem | Likely Cause | Solution | Further Reading |
|---|---|---|---|
| Powder not fine enough | Under-grinding, overfill, or blade wear | Smaller batch; more pulse cycles; check blade | Spice Grinder Not Fine Enough |
| Chunks left in powder | Uneven fill, blade not catching all seeds | Shake between pulses; load less; use sieve | Why Grinder Leaves Chunks |
| Burning smell from motor | Overheating, jamming, too-long runs | Stop immediately; rest 5 min; reduce batch | Motor Burning Smell |
| Lid won’t open after grinding | Pressure buildup or misaligned lock | Tap sides, cool grinder, try gentle twist | Lid Stuck Fix |
| Strong residual odor | Oily spice residue (cloves, anise, chile) | Rice grind + bread grind + dry wipe | Odor Removal Guide |
| Spice tastes like coffee | Coffee oil residue in shared grinder | Rice clean first; consider dedicated unit | Coffee in Spice Grinder |
| Grinder stops mid-use | Thermal cutoff triggered by overheating | Let rest 10–15 min; reduce batch next time | Grinder That Doesn’t Break |
Advanced Techniques for Better Results
Once the basics are second nature, these techniques separate functional grinding from genuinely excellent results:
Sieve for guaranteed fine texture
After grinding, pass the powder through a fine-mesh strainer into your bowl. The material that doesn’t pass through — larger particles — goes back into the grinder for one more cycle. This two-pass approach guarantees uniform fine powder and works especially well for cinnamon, cloves, and cardamom, which resist perfectly uniform grinding even in quality blade grinders.
Freeze spices before grinding
For particularly oily spices (cloves, star anise, allspice), placing them in the freezer for 20–30 minutes before grinding reduces the heat impact on their oils and makes the grinding itself slightly faster. Cold spices are also more brittle, which helps with hard varieties like cinnamon.
Grind your own spice blends in batches
Making a full batch of garam masala, za’atar, or baharat takes the same amount of time as a single-spice grind but gives you weeks of perfectly balanced, fresh-ground blend. Store in a labeled glass jar away from heat and light. Fresh-ground blends outperform any commercially produced version — the difference is immediately noticeable.
Toast whole blends together, then grind
When making a multi-spice blend, toast all the whole spices together in one pan rather than separately. The spices toast at slightly different rates, which actually produces a more complex, layered blend than toasting each individually. Stir constantly and watch closely — the blend is ready when the most delicate component (usually cumin or fennel) smells done.
🔗 Complete Spice Grinder Resource Hub
This article is part of the SpiceInsider spice grinder hub. Related guides: grinding without a grinder · how to clean a grinder · dos and don’ts · whole vs. pre-ground · toasting before grinding
Storing Your Freshly Ground Spices
You’ve done the work — now protect the result. Freshly ground spice is significantly more volatile than whole spice. The increased surface area means oxidation begins immediately and accelerates with heat, light, and moisture exposure.
Use small, airtight glass jars
Repurposed spice jars, small mason jars, or Weck jars all work well. Glass is impermeable to aromatic compounds — unlike some plastics, which allow spice oils to slowly permeate through the walls. Fill jars as fully as possible to minimize the headspace (air above the spice) that accelerates oxidation.
Label with the grind date and spice name
Ground spices are best within 3–6 months of grinding. Labeling takes five seconds and saves you from using stale ground cumin thinking it’s still fresh.
Store away from the stove
Heat is the primary enemy of ground spice quality. The cabinet directly above or beside the stove — where most people store their spices — is actually the worst location. A drawer away from heat, or a cool pantry shelf, is far better.
✅ Good Storage Practices
- Airtight glass jar, filled to the brim
- Cool, dark cabinet or drawer
- Labeled with grind date
- Small batches, ground as needed
- Away from the stove and oven
❌ What Degrades Spice Quality Fast
- Loosely lidded jars with large air gaps
- Clear glass on a sunny windowsill
- Cabinet directly over the stove
- Grinding months’ worth at once
- Plastic containers (permeable to oils)

Ideal for storing freshly ground spice blends — airtight seal, clear glass for quick identification, stackable for efficient storage.
Shop on Amazon →Frequently Asked Questions
Conclusion: Small Techniques, Big Results
Using a spice grinder well is one of those kitchen skills where a small amount of knowledge creates a disproportionately large improvement in your cooking. The pulse technique, the correct fill level, toasting before grinding, and cleaning after every use — these four habits alone will produce better-tasting ground spice than most home cooks ever achieve with the same equipment.
The difference between ground spice that elevates a dish and ground spice that’s merely present often comes down to freshness, technique, and quality of the whole spice you started with. Now you have all three covered. For deeper dives into specific scenarios — odor removal, stuck lids, motor issues, or choosing a grinder — the full SpiceInsider guide network has you covered.
Explore the full grinder resource hub, including our comparison of the best blade and burr grinders, our top spice grinder picks, and our complete guide to spice grinder dos and don’ts.
Find the Best Spice Grinder for You →
Powerful 200W motor, stainless steel bowl, and a simple one-touch design that makes the pulse technique effortless. A bestseller with 30,000+ reviews.
Check Price on Amazon →